Assembly and Operation
of
iPad/Tablet Floor Stand

Assembly and Operation
of
iPad/Tablet Floor Stand
Assembly
Note: this stand now comes in just silver. Both silver and black are shown. Our latest version allows the stand to travel knocked down, with an iPad and clothes in a suitcase. The following directions assume that the stand is right in front of you, getting ready for you to use. The vertical pole comes positioned on the left. Total assembly time should be about ten minutes.
All main physical parts are labeled in the box Parts Description, and in the text below. For ease of understanding, parts are grouped into four sub-assemblies.
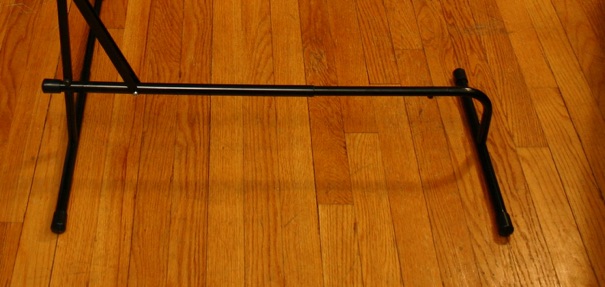
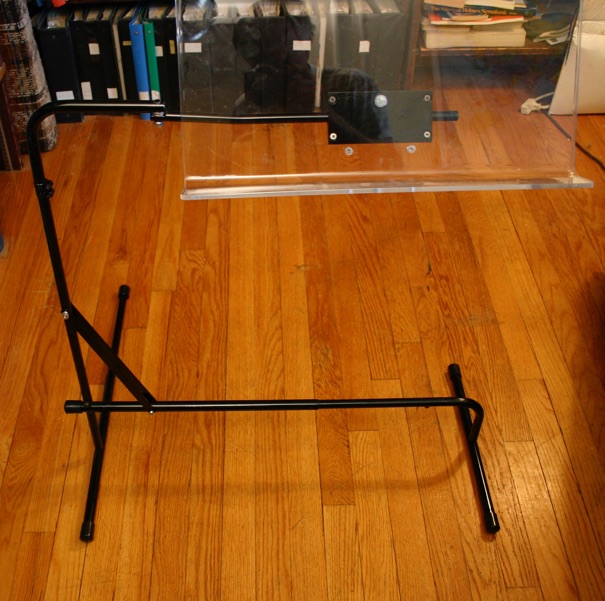
1. Start with the 1. Right Half of the Base Assembly. This now comes completely assembled. See Assembly in picture below. The Right Base Leg is labeled: 1.1 Right Base Leg. The 1.1 Right Base Leg has a furniture cap at each end. These parts are Labeled: 1.2 Right Leg Front End Cap and 1.3 Right Leg Rear End Cap with Floor Glide.
Attached to the middle of the 1.1 Right Base Leg is the 1.4 Right Horizontal Cross Tube, 5/8” Diameter.
Note the 1.5 Telescoping Base Adjustment Tube on the left of 1.4 Right Horizontal Cross Tube, 5/8” Diameter. Press the snap button at the left end of the 1.4 Right Horizontal Cross Tube, 5/8” Diameter and slide the 1.5 Telescoping Base Adjustment Tube three holes to the left.
2. Next, locate Left Base Assembly (See left side of picture below). Locate the 2.1 Left Base Leg. Inside the front of the 2.1 Left Base Leg will be the 2.2 Left Base Leg Tube Extender, already inserted by means of the snap button at the back of 2.2 Left Base Leg Tube Extender. See left side of picture below for completed look.
Next, locate the 2.3 Left, Horizontal, 3/4” D Cross Tube on the 2. Left Base Assembly. Turn this tube to the right and insert it into the, left end of the 1.5 Telescoping, Base Adjustment Tube with the many adjustable holes in it. Fasten together using the socket cap screw and the following procedure: remove the Socket Cap Screw on the underside; insert the two sides of the horizontal base cross-tube together, reinsert the cap screw and tighten this screw with the Allen wrench provided. The adjustable holes should face to the right. (See photo below.)
Locate the 2.3 Left Base Riser on the 2. Left Base Assembly. Remove 1/4" socket cap screw from 2.4 Left Base Riser. Raise the two Struts, Labeled: 2.5 Struts (See picture below).
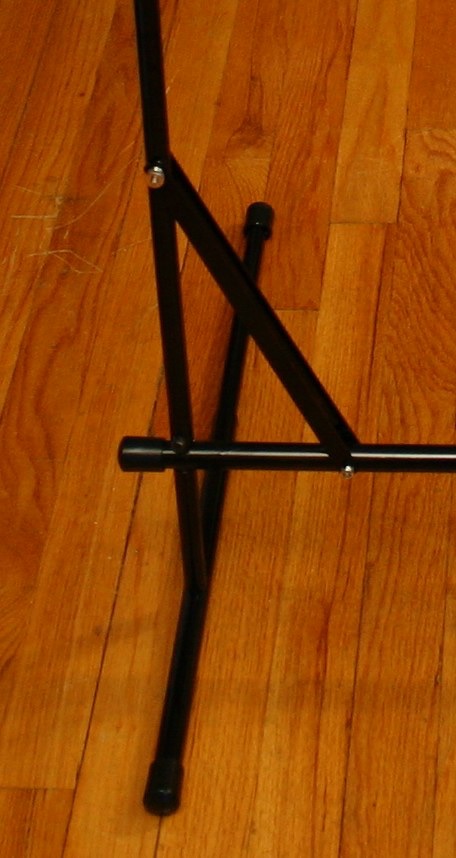
3. Locate the 3.1 5/8” Diameter Riser Tube Assembly. Then insert the 3.1 5/8" Diameter Riser Tube (19" long) over 2.4 Left Base Riser, so that the attached 3.2 Hose Clamps are on top, and the hole in the bottom of the 3.1 5/8” Base Riser lines up with socket cap screw hole in 2.4 Left Base Riser. Using the Allen wrench, reinsert the 1/4" socket cap screw and tighten. Remove Allen wrench. See picture below for location of Socket Cap Screw Hole in the 3.1 5/8" Diameter Riser Tube (19" long).
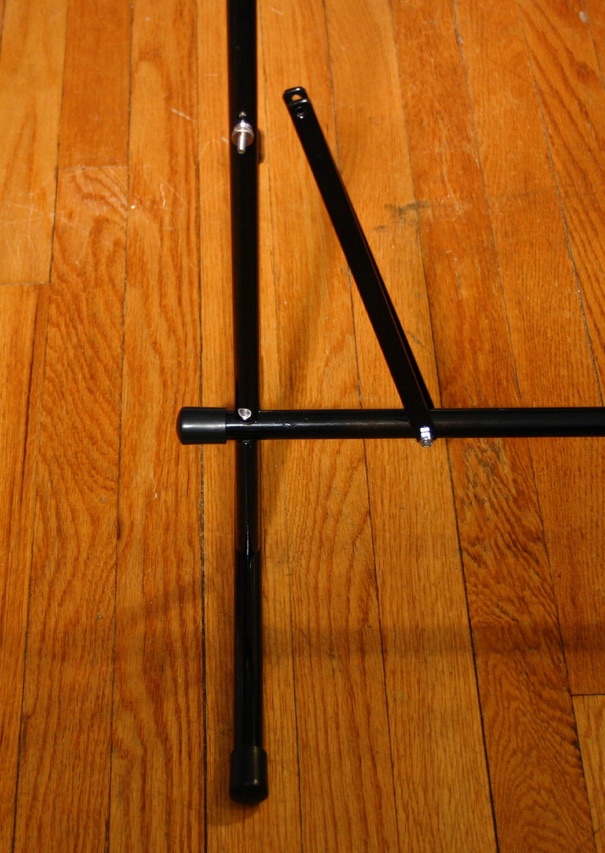
Remove wing nut and silver 8/32" bolt from the left end of the two 2.5 Struts. Line up two struts over hole half way up 3.1 5/8” Diameter Riser Tube. (See photo above for positioning.) Re-insert 8/32 bolt through front strut, then tube, then back strut. Add wing nut. See picture below (Note. Sometimes a knurled nut is used instead of a wing nut).
4. Remove Lectern Assembly from box. (See picture below.) Note: this picture shows the former, optional larger lectern. We now only provide the standard size lectern. The lectern is Labeled: 4.1 Lectern.
Behind the 4.1 Lectern is the 4.2 Lectern Mounting Plate and Clamps. These clamps grasp onto the 4.3 Lectern Mounting Rod.
On the left side of the lectern, the 4.3 Lectern Mounting Rod forms the 4.4 Lectern Hinge with the 4.5 Bent Hinge Pole (See picture below). Use the flat wrench and Allen wrench (both supplied) to tighten this hinge as needed.
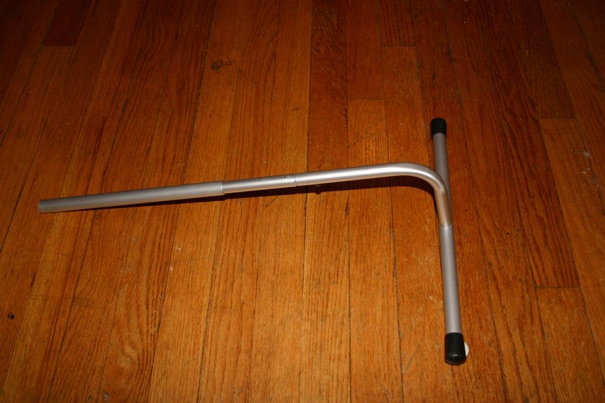
Insert the bottom end of the 4.4 Bent Hinge Pole into the top of the 3.2 5/8” Diameter Riser Tube. See photo below.
Use the two nylon cords to tie the base to the left and right chair legs, with the unit just in front of, or just behind the front legs of the chair.
Operation of Unit
Adjusting Width of Base
Place base of stand under your chair and adjust the width of the base to be just wider than the legs or base of the chair. Press the snap button to go from one hole to the next.
Height Adjustment
Remove lectern from base by raising lectern arm. Add 1”, 2”, or 4” sleeve (or any combination thereof up to 6”) to the lectern arm, and then reinsert lectern arm into base. See photo below of the three height-adjustment sleeves.
The unit comes with a base height of 25” from the floor to the lip of the Standard Lectern (which is the size of an iPad). In addition to the three extension tubes, a 7” extension is provided for use of the unit with a bed. The set of three extension lengths can be used with this extension as well.

Adjusting Swinging Resistance of Lectern Arm
Using flat head screwdriver, or dime, tighten top hose clamp a little at a time until swinging resistance is what you want. Adjust anytime.
Swinging Arm Forward or Backward
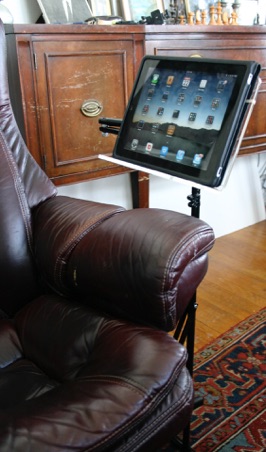
Just push the lectern forward or pull it back for quick exit or access to chair.
Note: You can also bend the lectern arm on itself to move the lectern off the seat. The best way to bend the lectern arm is to hold the left part of the lectern arm with your left hand (just to the left of the hinge) and pull your left hand towards you, as you push the lectern itself away from you with your right hand. Note: be sure to pull out the base extender under the swinging arm.
This is also one way to leave the lectern for any period of time. In the bent position, the lectern rests directly over the left armrest. See picture below.
Choice of Lectern Size
The unit is currently available in just the standard size, which is the size of an iPad, and ideal for any size iPad or Tablet.
Adjusting Tilt of Lectern
Just turn lectern to desired angle over bar, adjusting the two wing nuts on the back of the lectern as needed.
Sliding Lectern Left or Right on Bar
Loosen the two wing nuts behind the lectern, slide the lectern left or right, and then retighten the wing nuts. Occasionally, you may have to remove the lectern first.
Adjusting Lectern to Be Level
Rotate lectern clockwise or counter-clockwise to adjust for tilt caused by different weights on lectern. Only a small adjustment is usually required.
Adjusting Distance of Lectern from Eyes
Swing the left part of the lectern arm forward, or backward, the desired amount, and then adjust the lectern itself to be directly in front of your eyes.
Tying Base of Stand to Chair
Ideally, you tie the left and right sides of the base to the front legs of your chair. The base crossbar is designed to fit either just in front of the front legs, or just behind the front legs (under the seat). The base bar telescopes out for just the right distance. Two black nylon cords are supplied for tying the front chair legs to the base crossbar.
Extending Front, Base Length for More Stability
Make sure to use the base extender for additional stability when swinging the lectern forward.
To Tighten Hinge in Swinging Arm
Use Allen wrench in hex cap screw and turn, as you hold nut with the supplied wrench, or a pair of pliers or an adjustable wrench. You should only need to do this occasionally.
To Tighten Lectern to Plate
Use screwdriver and turn head of bolt in center of lectern, as you hold nut with the supplied wrench, or a pair of pliers or an adjustable wrench. You should only need to do this occasionally. Do not over tighten.
To Change the Pole Configuration
You can easily change the pole configuration, so the upright pole and lectern are on the opposite side. The unit comes with the vertical pole configured to be on the left of your chair, sofa or bed. To change the configuration, first unsnap and reverse, in turn, the two snap-on end caps on each base leg. Then turn the stand 180 degrees. Finally, loosen the two wing nuts on the back of the lectern, slide the lectern off its pole, turn ithe lectern 180 degrees, slide it back on its pole, and tighten the two wing nuts as much as desired. Do not over tighten.
For Lectern at Eye Level
If you have low vision and need the lectern to be at eye level, use the 7” adjustable height extension. Be sure to tighten both hose clamps at the top of the lower pole after inserting the 7” adjustable height extension.
To Type on Your iPad
Use an external wireless bluetooth keyboard on your lap or a pillow. This unit is meant for viewing screens; it is not meant to be a desk for typing and writing; we have other products for that.
Call with any questions: 978-927-9234.
