User Manual
For
iPad Floor Stand
Setup and Operation

User Manual
For
iPad Floor Stand
Setup and Operation
Setup
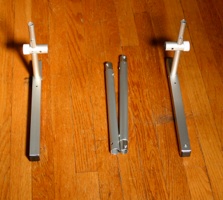
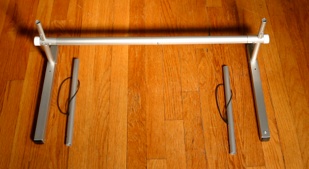
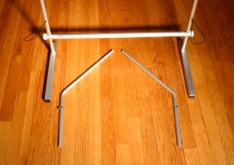
1. Unpack left and right base members (1” square tubes) and place them facing each other. See picture below on left. Also locate and place cross bar members between these base legs. The two cross bar members are connected by a shock cord. Then snap together the left and right cross bar members. See picture below on right.
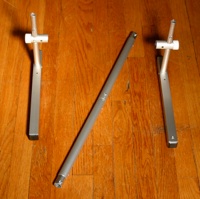
2. Snap each end of cross bar into its respective side. Note: all joints on left side are marked with one dimple, and all joints on right side are marked with two dimples. See photo below right.
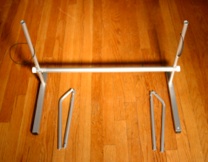
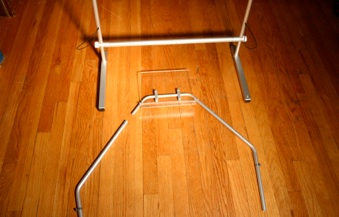
3. Lay out the left and right first risers, as shown in the photo below on left. Note: the bottom of each riser is marked with either one (left) or two (right) dimples. The bottom part of each riser also has shock cord in it, and a hole for a snap button. Next snap each riser onto its base member, as shown in the photo below on right.

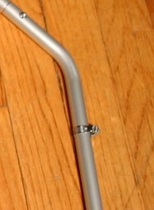
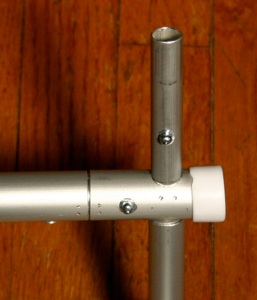
4. Line up second and third risers on each side, as shown in photo below on the left. Note: the second and third riser on each side are connected by shock cord for easy handling, and make a set. Next, snap together the second and third risers in each set, as shown in the photo below in middle. Note: there is one dimple at the joint area on the top of the left set, and two dimples on the top of the right set, where each set snaps into the lectern. Note: There is also a hose clamp on the bottom section of each second riser, and this hose clamp should face out, with the screw head facing you. See photo below on right.
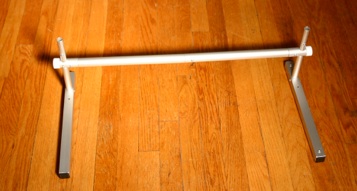
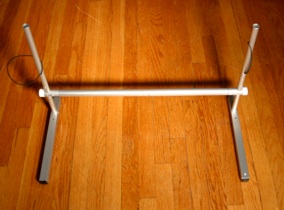
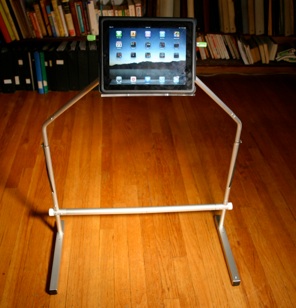
5, Snap left and right sides of lectern into the respective left and right third risers. See photo below on left. Then raise up the lectern and insert the bases (of the second risers, these are the sections with hose clamps) into the base. The lectern should now be towards you, and about half way down the length of the base legs. See photo below on right.

6. Finally, set your iPad on the lectern, preferably in landscape mode, and clamp the back of the cover to the lectern, using the two clamps provided. Alternatively, you can put a rubber band high up on the back cover and then also slip this rubber band onto the back of the lectern. See photo below. You are now through the setup.
Operation
1.Once set up, adjust the hose clamps for your desired height. The best way to do this is to use a flat head screwdriver and set one side at the height you want. Then raise or lower the other side until the lectern is level.
2.Once the height is set, raise the shock cord on the first riser over the hose clamp on each side of the unit. This will keep the base and the lectern together whenever you are lifting the whole unit. Unhook the shock cord from the hose clamp whenever you want to lift off the lectern. The lectern will come off extremely easily.
3. Always, lift off the lectern before removing the sides from the lectern. This process is much easier than trying to force fit parts when they are all assembled.
4. When and if you want to use the iPad in overhead mode, add two rubber bands over the bottom lip of the lectern and the bottom of the iPad, below the active part of the screen. Then tilt the lectern down.
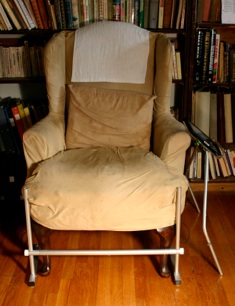
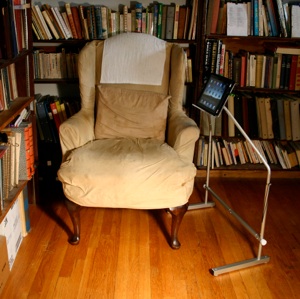
5. For temporary storage, set the whole unit to the side of your chair or, alternatively, lift the lectern off the base of the unit, and set the lectern to the side of your chair. The base of the unit can rest against the front of the chair or under it. See photo just above on right.
6. For more storage, both top and bottom of lectern can go behind chair.
7. For even more storage, unsnap crossbar on base and put the three base parts in a drawer. Also unsnap the sides of the lectern and put these sides and the lectern in the same drawer. There is no need to fully disassemble the base crossbar and/or risers, unless you want to do so.
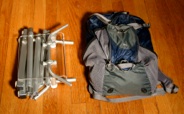
8.Unit stores easily in day pack. See photo below on left.
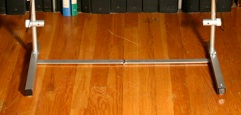
9.If you are using the Exercise Bicycle Accessory Kit, unfold the flat bar and place it under your exercise bicycle. Then set your lectern over the two bolts on the flat bar and tighten the two bolts down with the two wing nuts. See photo below on right. Add the two extension risers if necessary. These extensions go on top of the first risers on the base of the stand. Then add the lectern.